The
tree view is your main tool for organizing your collection and
selecting the items you wish to edit. Following the screen
capture below is a description of the tree functionality.
Please see my examples web page
(https://www.nmcollectorsoftware.com/support1/examples/) for ideas on how to
use this tree.
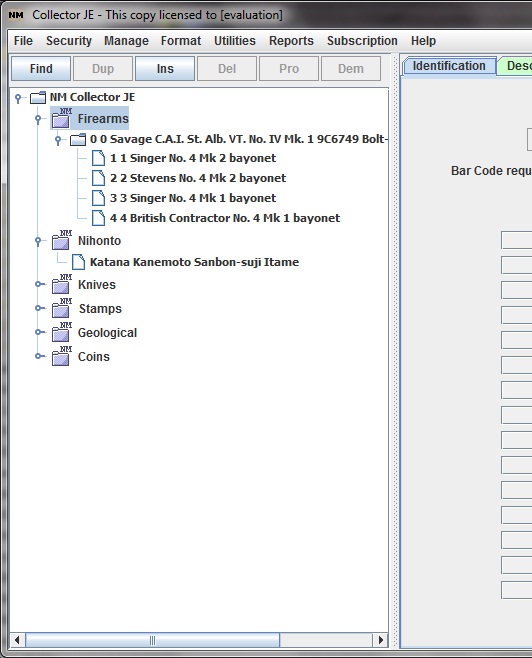
As
you can see from this excerpt, we can view all or parts of our
collections in this tree view. Collection types are shown as a
special "NM" folder while items in the collection type are
listed under the collection type. Some items themselves look
like folders while others look like a simple sheet of paper.
More on this later under "Sub Folders" (below).
The
buttons at the top are enabled and disabled as appropriate to where
we are in the tree. In this case we have a collection type
(Firearms) selected so only buttons that apply to an entire
collection type are enabled. At this point it makes sense to
Find an item in the collection or to Insert (Ins) a new item in the
collection. More on the buttons later.
Select
an Item
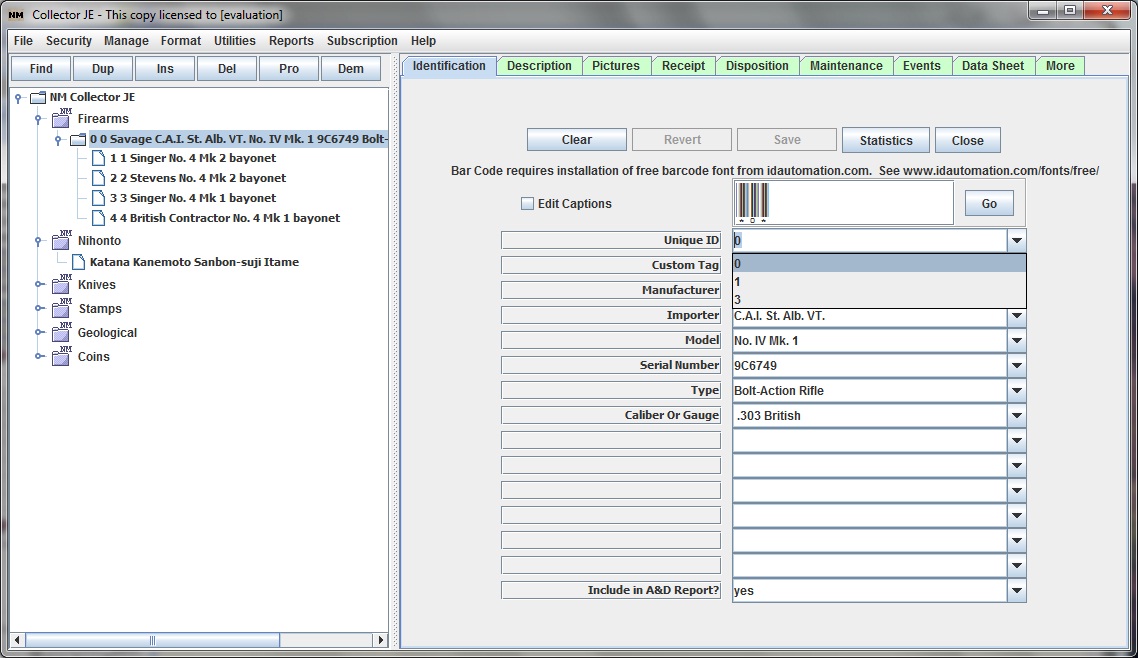
In
the picture above we have selected an item to edit. The values
for the selected item are populated in the tabs for easy viewing and
editing. Also note that all of the buttons above the tree are
now enabled. All of them make sense when an individual item is
selected.
Drag
and Drop
At
this point it makes sense to discuss dragging and dropping items in
the tree view. You can move an item to any location you wish
by simple clicking on it and holding the mouse button while you move
it in the tree then letting go of the mouse button where it is where
you want it.
Sub
Folders
As
noted above, some items look like folders while others don't.
You can create sub folders to associate items with other items or to
collect items for whatever reason makes sense to you. To
convert an item to a sub folder simply select it and click the
"Ins" button to insert a new item to be associated with it
or "Demote" (Dem) the item located directly below
it. Now you can add other items to the folder by inserting new
items in the sub folder or dragging and dropping other items to
it. Notice that the sub folder still retains it's identity as
an item so you can manage information about it or, if it makes
sense, you don't need to manage any information about it. An
example of a folder that would not require any data would be a
location folder (such as bedroom safe) created simply to manage the
location of items.
Buttons
Now
is the time to discuss the functionality of each individual button.
Find
-
locate any item in the tree based on a text value in one of the
first Identification fields. This is particularly useful for
large collections.
Dup
(Duplicate)- create a new item based on the currently
selected item. All relevant ID, Description, Receipt, and
Disposition data will be copied. This is particularly useful if you
acquire many similar items at the same time. Be sure to change
something immediately after the duplication so as to distinguish the
items one from another.
Ins
(Insert) - create a new item from scratch. If a collection is
selected when the Ins button is pressed, the new item will be
inserted as a member of that selected collection. If an item
is selected when the Ins button is clicked the currently selected
item will be converted to a folder and the newly inserted item will
be automatically associated with that item. If this is not
your intent you can use the Dem (Demote) button below to make the
newly inserted item an equivalent to the selected item.
Del
(Delete) - delete the current item. Be careful with this as
there is no recovery unless you recover your database from backup.
Pro
(Promote) - promote (shift left) the selected item.
Dem
(Demote) - demote (shift right) the selected item.